Adding IIIF support to your Project Blacklight catalog
I promised to jot down a few notes on how we publish images in our Project Blacklight based catalog with IIIF. The International Image Interoperability Framework is a set of API’s that enable flexible publishing, sharing and (re)use of images over the Web. It’s specifically tailored towards the digital cultural heritage domain. In this post, I’ll outline how you can easily integrate IIIF support in your own projects.
What is IIIF?
IIIF or the International Image Interoperability Framework is a set of standards that describe how images, and associated metadata, can be automatically shared across the Web. IIIF breaks down into four API’s: the Image API, the Presentation API, the Authentication API and the Annotation API. With IIIF you can easily integrate a variety of viewers, zoomtools, etc. in your applicaiton and expect them to just work out of the box with any IIIF complaint API. The entire goal of IIIF is ‘publish once, reuse many times’ in various contexts ranging from simple publishing to machine learning.
What is Project Blacklight?
Project Blacklight is a Ruby on Rails based discovery interface. It’s a Ruby gem that provides a powerful, highly customisable faceted search interface. The backend is Apache Solr, a highly performant search engine. With Project Blacklight you can create digital catalogs containing millions of records. Project Blacklight is used by dozens of large libraries and research organisations. But it can also be used to open up other types of collections such as digital heritage.
A fictious use case
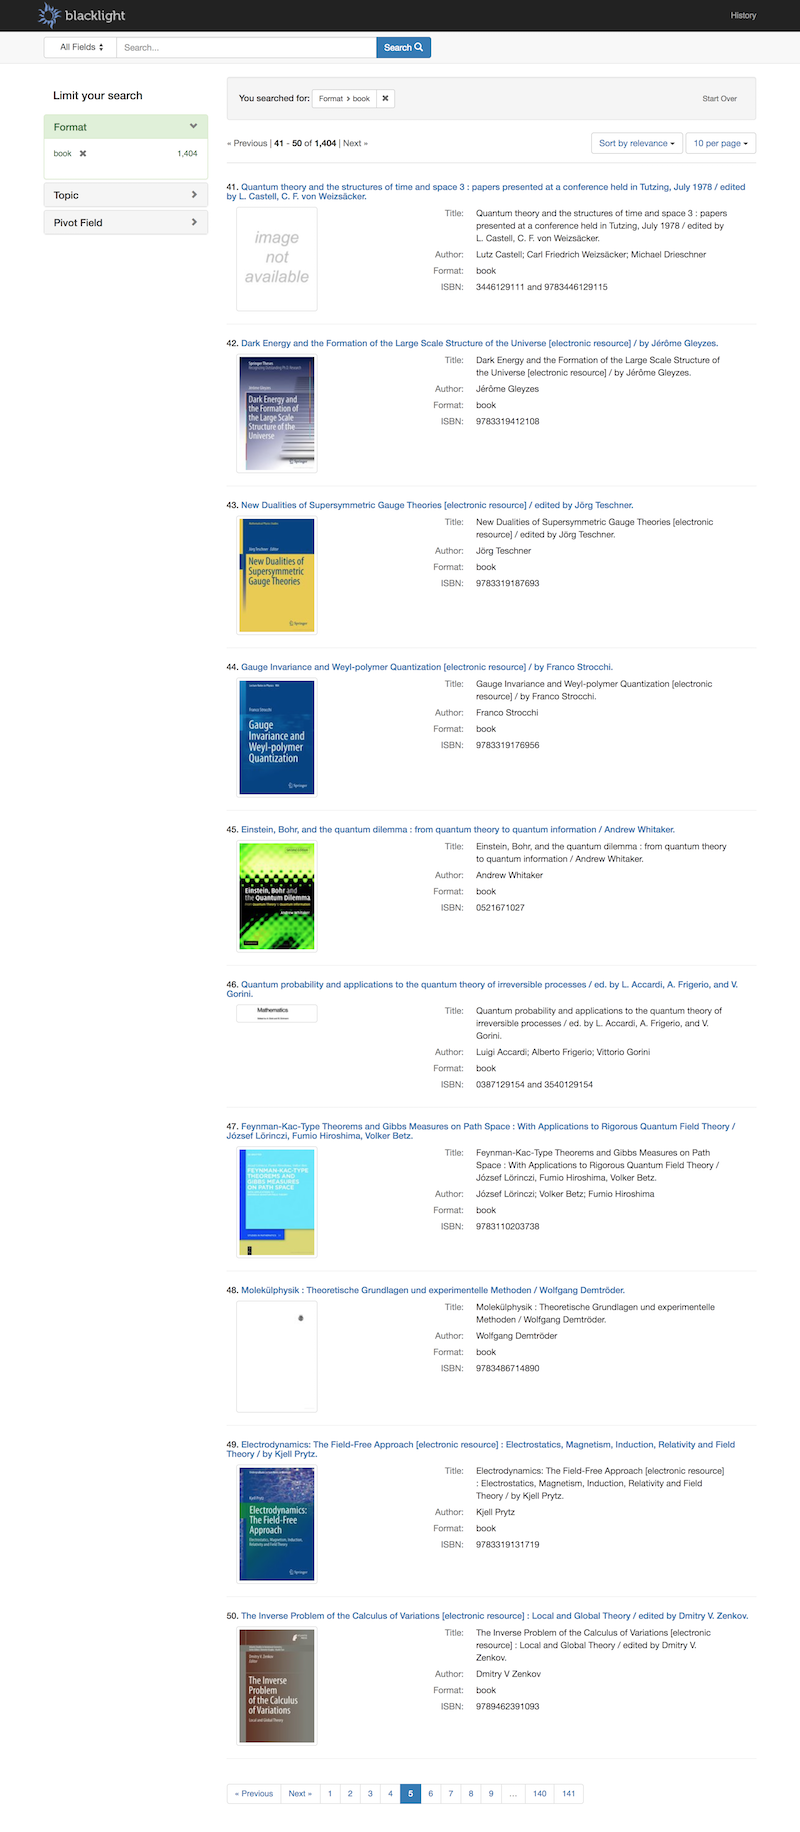
In this article, I’m going to guide you through a fictious use case. Let’s assume I’m a researcher in the field of Quantum Theory. For my own purposes, I’ve setup a local Project Blacklight instance on my computer. I’ve ingested a dataset with library records I got from the University Library of Ghent. Now, I would like to display any available book cover next to the records. This would help me to easily browse through my personal catalog.
On the results page, I would like to see a thumbnail next to each record:
On an individual page, I would like to add the Mirador Viewer so I can see the cover in a zoom tool:

Before we start
Project Blacklight doesn’t come with handy facilities to upload and serve static assets. You need to provide image hosting yourself. This assumes that you stored your images somewhere else. Maybe you publish your images via your own website, maybe you have a full blown DAM. Then there are also a variety of “poor man’s” hosting solutions. You could put your images up on Amazon S3, or even Dropbox (which leverages S3 under the hood). Or you could just go with what’s on Wikimedia Commons. The important part is that we have our images hosted someplace, we have their URL’s and we can consume them over HTTP.
Our challenge mentions that we need to use book covers. Luckily, we don’t have to look far. Google Books provides book covers as thumbnails. We can reuse those in our application. More specifically, this entails that we somehow fetch images from Google Books and serve them through a IIIF API to our application. Google Books provides a feature called dynamic linking. This will provide the URL’s we need. More on that further on.
I’m also going to assume you know your way around Rails. You don’t need to be a Ruby guru, but you do need to have the basics of Rails down. Familiarity with Project Blacklight as well as having some basic notion about IIIF is a plus.
Our approach
Getting IIIF support in our application boils down to these three steps:
- Get an IIIF Image server up and running. This service implements the IIIF image API and publishes images accordingly.
- Implement a new route in our Rails application. The corresponding controller/action will provide manifest.json files which validate with the IIIF Presentation API specification.
- Integrate the Mirador viewer in the document view of our Blacklight application. The viewer consumes the manifest.json file associated with the currently loaded document. This will load the image and the associated IIIF metadata in the viewer.
What we’ll need
We’ll add three Ruby gems to our Rails project:
- riiif. This is a Rails IIIF server created by Curation Experts. This gem implements the IIIF Image API that will serve the images.
- presentation-iiif. This gem allows us to easily implement the Presentation API that will generate the IIIF manifest files the viewer needs.
- mirador-rails. This gem brings the Mirador viewer to Rails. Add the gem, and it will load all the CSS and JavaScript automagically via Sprockets.
These 3 gems take care of 80% of the heavy lifting. The other 20%, wiring up everything up in our application, represents the bulk of our effort.
Let’s break down each step.
The riiif gem
Let’s add the riiif gem to our application:
$ bundle add riiif
$ bundle install
Now, we’re going to add these lines to our /config/routes.rb file:
ALLOW_ANYTHING_BUT_SLASHES = /[^\/]+/

constraints id: ALLOW_ANYTHING_BUT_SLASHES, rotation: Riiif::Routes::ALLOW_DOTS, size: Riiif::Routes::SIZES do
  # Route to the IIIF Image API
  get "/iiif/2/:id/:region/:size/:rotation/:quality.:format" => 'riiif/images#show',
    defaults: { format: 'jpg', rotation: '0', region: 'full', size: 'full', quality: 'default', model: 'riiif/image' },
    as: 'riiif_image'

  # Route to IIIF Image API info.json
  get "/iiif/2/:id/info.json" => 'riiif/images#info',
    defaults: { format: 'json', model: 'riiif/image' },
    as: 'riiif_info'

  # Redirect the base route to info.json
  get "/iiif/2/:id", to: redirect("/iiif/2/%{id}/info.json"), as: 'riiif_base'

  # Route to the IIIF manifest.json for a particular image.
  get "iiif/2/:id/manifest.json" => "images#manifest",
    defaults: { format: 'json' },
    as: 'riiif_manifest'
  end
The last route is not a part of the riiif gem. It’s a custom route we’ll add to serve IIIF manifest data. We’ll get back to that in the next part.
Next up is letting riiif know where the images are stored. Create a new
initializer in /config/initializers/riiif.rb. Add these lines:
Riiif::Image.file_resolver = Riiif::HTTPFileResolver.new

Riiif::Image.file_resolver.id_to_uri = lambda do |id|
  "https://books.google.be/books?vid=ISBN&printsec=frontcover&img=1&zoom=0&vid=ISBN#{id}"
end
The Riiif::HTTPFileResolver does exactly as it says: it will dynamically
download an image from a remote location via a public URL (resolving), store a
cached copy in the applications /tmp/network_files folder. Riiif will serve
images from this folder.
In our case, we pass in the dynamic link on Google Books to retrieve the image. Note how we use the ISBN number here to identify the work on Google Books and fetch the correct image. The ISBN number will be passed on from the IIIF routes.
There’s also the Riiif::FileSystemFileResolver which will make riiif fetch
images from a directory on the local filesystem. You can also roll your own
FileResolver if you need to.
Fire up your browser. Assuming we have a record titled ‘Electrodynamics: The
Field-Free Approach [electronic resource] : Electrostatics, Magnetism,
Induction, Relativity and Field Theory / by Kjell Prytz.’ with ISBN 9783319131719, you should now see the corresponding
cover when you navigate to http://localhost:3000/iiif/9783319131719/id/full/full/0/default.jpg.
When you navigate to http://localhost:3000/iiif/9783319131719/id/info.json you
should see the associated technical information.
presentation-iiif
Having an IIIF Image API is just the basics. If you want to leverage the full
breadth of IIIF, you will also need an associated manifest.json file per
image. This file provides administrative, technical and descriptive metadata
for IIIF compliant clients such as Mirador or Universal Viewer.
The JSON structure of a IIIF manifest needs to adhere (validate) to the
IIIF Presentation API. There are many ways of generating a valid manifest. But
getting it right takes a bit of effort. Luckily, the presentation-iiif gem
abstracts part of the Ruby code you’d write making things a bit less painful.
Remember the extra manifest route we added in /config/routes.rb? We’re going
to create a controller and action associated with this route that will take c
are of generating our manifest file.
$ rails generate controller Images manifest
This creates a new file /app/controllers/images_controller.rb:
class ImagesController < ApplicationController
  def manifest
  end
end
Next up, we’ll install the presentation-iiif gem:
$ bundle add iiif-presentation
$ bundle install
So, now we’re set that to implement the manifest action in the controller. Our first step is to associate our controller with Blacklight:
class ImagesController < ApplicationController
  include Blacklight::Catalog

  def manifest
  end
end
This makes the entire Blacklight API available in our custom controller. We’ll use that to fetch data from the active Solr document. Like this:
class ImagesController < ApplicationController
  include Blacklight::Catalog

  def manifest
    @response, @document = fetch params[:id]
    puts @document
  end
end
When you navigate to http://localhost:3000/iiif/2/9783319131719/manifest.json,
you’d see the entire solr document with id id in your log file. We’re now able
to fetch descriptive data from our Solr document and use that in our manifest.
Without much further ado, the next listing shows an minimum implementation of the controller action:
class ImagesController < ApplicationController
    include Blacklight::Catalog

    def manifest
      # @response, @document = fetch params[:id]
      isbn = 'isbn:' + params[:id]
      @response, @document_list = search_results({ 'q': isbn})
      @document =  @document_list.pop

      # artefact holds the information you'd find in info.json. Fetching the
      # info.json over HTTP is too cumbersome. Since we can use a Rails model
      # in any controller, we just instantiate the Riiif::Image model with the
      # id of the IIIF image.

      artefact = Riiif::Image.new(params[:id])

      # We'll prepare a seed variable which we'll use to create a manifest.
      #
      # The routes we defined in routes.rb are named routes. Suffixing them
      # with _url or _path and calling them as functions yields either an
      # absolute url or a relative path. So, riiif_manifest_url yields the
      # absolute url to the manifest we're currently building.
      #
      # We also fetch the title_display field from the Solr document with the
      # fetch method from the Blacklight API.

      seed = {
          '@id' => riiif_manifest_url(params[:id]),
           'label' => @document.fetch(:title_display)
          # 'label' => 'foobar'
      }

      # Now, let's get started building a Riiif::Manifest object. We'll convert
      # that into json with the to_json method before returning the result.

      # Let's use iiif-presentation to create a "service" resource. We'll reuse
      # this variable.

      service = IIIF::Presentation::Resource.new('@id' => riiif_base_url(params[:id]))
      service['@context'] = "http://iiif.io/api/image/2/context.json"
      service['profile'] = "http://iiif.io/api/image/2/level2.json"

      # Instantiate a new Manifest object.

      manifest = IIIF::Presentation::Manifest.new(seed)

      # Let's create a thumbnail and add that to the manifest object under the
      # "thumbnail" key.
      #
      # We use the riiif_image_url to get an absolute URL to the IIIF Image
      # served by riiif.

      thumbnail = IIIF::Presentation::Resource.new(
          '@id' => riiif_image_url(id: params[:id], size: '400,400')
      )
      thumbnail['@type'] = 'dctypes:Image'
      thumbnail['format'] = 'image/jpeg'
      # Here we'll just add our service variable to the manifest for the first
      # time.
      thumbnail['service'] = service
      manifest['thumbnail'] = thumbnail

      # IIIF manifest files have fixed structure:
      #
      #   manifest > sequence > canvas > images > image
      #
      # Let's create a new sequence and a canvas

      canvas = IIIF::Presentation::Canvas.new()
      sequence = IIIF::Presentation::Sequence.new()

      # A valid IIIF manifest identifies each sequence, canvas, resource,...
      # with an @id that requires a valid HTTP url. The URL could resolve to
      # that particular sequence fragment served from a remote location. It's
      # not a requirement though, so a random UUID based URL will do.

      sequence['@id'] = "http://" + SecureRandom.uuid
      sequence['@type'] = 'sc:Sequence'
      sequence['label'] = 'Current order'
      sequence['viewingDirection'] = "left-to-right"

      canvas_id = "http://" + SecureRandom.uuid
      canvas['@id'] = canvas_id
      canvas['width'] = artefact.info.width
      canvas['height'] = artefact.info.height
      canvas['label'] = "Image 1"

      image = IIIF::Presentation::Resource.new('@id' => "http://" + SecureRandom.uuid)
      image['@type'] = 'oa:Annotation'
      image['motivation'] = 'sc:painting'

      # Here we refer to the canvas that we associate this image with.

      image['on'] = canvas_id

      # This is the actual image with information from the Image API.

      resource = IIIF::Presentation::Resource.new('@id' => riiif_image_url(params[:id]))
      resource['@type'] = 'dctypes:Image'
      resource['format'] = 'image/jpeg'
      resource['width'] = artefact.info.width
      resource['height'] = artefact.info.height

      # Here we wire everything together in one big Ruby variable.

      resource['service'] = service
      image['resource'] = resource
      canvas['images'] = [ image ]
      sequence['canvases'] = [ canvas ]
      manifest.sequences << sequence

      # Now we render the manifest variable into a valid JSON object that gets
      # send over HTTP.

      render json: manifest.to_json(pretty: true)
    end
end
Fire up your browser and navigate to http://localhost:3000/iiif/2/9783319131719/manifest.json.
You should see the manifest JSON appear for this particular object. Using the
@document.fetch() method, you can wire in the object metadata from the Solr
index directly into the manifest file.
mirador-rails
The final step is adding an image viewer in the detail page of an object and actually load the image and the metadata in the viewer. We’re using Mirador because it comes pre-packaged in a Ruby gem. This makes integration a lot easier. You can also go with different viewers such as Seadragon, Universal Viewer or Leaflet.
Let’s install the mirador rails gem:
$ bundle add mirador_rails
$ bundle install
Next up, we need to load the CSS and Javascript files. The gem supports
Sprockets so we only have to add the correct lines in our app/assets files.
Javascript: app/assets/application.js
//= require mirador
CSS: app/assets/application.css
*= require mirador
We’ll also need to add a few lines in our app/config/routes.rb file:
Rails.application.routes.draw do
  ...
  mount MiradorRails::Engine, at: MiradorRails::Engine.locales_mount_path
  ...
end
Okay, now we’re ready to actually integrate Mirador in the detail (or document) page (or view) of a Project Blacklight installation. The idea is to show the viewer on the individual object pages.
Create a new file: app/views/catalog/_show_default.html.erb. What we do is
override the default _show_default.html.erb ERB template that comes with the
Project Blacklight gem and replace it with our own version.
The default code for Project Blacklight 6.11 in that file looks like this:
<% doc_presenter = show_presenter(document) %>
<%# default partial to display solr document fields in catalog show view -%>
<dl class="dl-horizontal  dl-invert">
  <% document_show_fields(document).each do |field_name, field| -%>
    <% if should_render_show_field? document, field %>
	    <dt class="blacklight-<%= field_name.parameterize %>"><%= render_document_show_field_label document, field: field_name %></dt>
	    <dd class="blacklight-<%= field_name.parameterize %>"><%= doc_presenter.field_value field_name %></dd>
    <% end -%>
  <% end -%>
</dl>
What we’ll do is mix in the mirador_tag() template code and add the
necessary configuration to wire everything up. This is how it should look:
<% doc_presenter = show_presenter(document) %>

<div class="mirador">
  <%= mirador_tag(
      id: "viewer",
      height: '500px',
      width: '100%',
      options: {
        layout: "1x1",
        data: [
         {
          manifestUri: render_iiif_manifest_url(document)
         }
        ],
        windowObjects: [
           loadedManifest: render_iiif_manifest_url(document),
           viewType: "ImageView"
        ]
      }
    )
   %>
</div>

<%# default partial to display solr document fields in catalog show view -%>
<dl class="dl-horizontal  dl-invert">
  <% document_show_fields(document).each do |field_name, field| -%>
    <% if should_render_show_field? document, field %>
	    <dt class="blacklight-<%= field_name.parameterize %>"><%= render_document_show_field_label document, field: field_name %></dt>
	    <dd class="blacklight-<%= field_name.parameterize %>"><%= doc_presenter.field_value field_name %></dd>
    <% end -%>
  <% end -%>
</dl>
The mirador_tag loads the manifest file for the object we’re currently
viewing. That in turn, will load the image and the metadata in Mirador and
displays everything to the user.
We’re not entirely finished yet. You’ve noticed the render_iiif_manifest_url
function. This is a helper function we need to create in app/helpers/application_helper.rb.
Like this:
module ApplicationHelper
  def render_iiif_manifest_url(document=@document, options = {})
    isbn = document.fetch(:isbn_t)
    riiif_manifest_url(isbn.first)
  end
end
It’s actually a wrapper around the riiif_manifest_url. Why? Because we can’t
(and honestly don’t want to) directly call the fetch method on the document
object in the template ERB. A helper method is a perfect fit to do that. This
function will fetch the ISBN number from the document, pass it to riiif_manifest_url
and then returns the IIIF manifest URL that the Mirador viewer requires.
Save the file, reload the Rails server, fire up your browser again and navigate to an individual record i.e. http://localhost:3000/catalog/ebk01:3710000000379570. You should now see how the Mirador viewer automagically loads the bookcover.
Congratulations! You’ve successfully integrated IIIF in Project Blacklight.
Thumbnails
We’re not finished yet, our final step is to add a thumbnail per record on the
search results pages. So, we’ll start by adding a new method to ApplicationHelper.
In app/helpers/application_helper.rb:
module ApplicationHelper
  def render_iiif_manifest_url(document=@document, options = {})
    isbn = document.fetch(:isbn_t)
    riiif_manifest_url(isbn.first)
  end

  def iiif_thumbnail_url_field(document=@document)
    isbn = document.fetch(:isbn_t)
    riiif_image_url(isbn.first, size: "120,")
  end
end
The function iiif_thumbnail_url_field pretty much works like render_iiif_manifest_url.
It fetches the ISBN number but instead of the manifest URL, it returns the
IIIF Image API url with a size parameter of 120 pixels (width).
Adding a thumbnail is easy. Project Blacklight provides an optional template.
Let’s create a new file: app/views/catalog/_thumbnail_default.html.erb and add
this code:
<%= image_tag iiif_thumbnail_url_field(document), class: "thumbnail" %>
Reload your rails server, fire up your browser and navigate to the catalog page at http://localhost:3000/catalog. You should now see the book cover per record.
The thumbnail and the index metadata aren’t visually aligned. The Project Blacklight interface is build with the Bootstrap framework, so we can leverage that to fix the layout:
<div class="documentBody row col-md-12">
  <div class="col-md-3 index-thumbnail">
    <%= image_tag iiif_thumbnail_url_field(document), class: "thumbnail" %>
  </div>
Notice how we don’t close the parent <div> element. This is a wrapper around
both the thumbnail and the record metadata. So, let’s also override the latter
template that includes these metadata. Create a new file in
app/views/catalog/_index_default.html.erb. Now add these lines:
    <% doc_presenter = index_presenter(document) %>
    <%# default partial to display solr document fields in catalog index view -%>
    <dl class="document-metadata dl-horizontal dl-invert col-md-9">

    <% index_fields(document).each do |field_name, field| -%>
        <% if should_render_index_field? document, field %>
            <dt class="blacklight-<%= field_name.parameterize %>"><%= render_index_field_label document, field: field_name %></dt>
            <dd class="blacklight-<%= field_name.parameterize %>"><%= doc_presenter.field_value field_name %></dd>
        <% end -%>
    <% end -%>

    </dl>
</div>
It’s basically the original template amended with the closing of the wrapper element. Refreshing the index page should now show you the fixed layout.
Conclusion
Following the steps, you should be able to add basic IIIF support in your own Project Blacklight project. And, by extension, any Ruby on Rails project.
This example reuses images fetched from Google Books. But you could use your
own resolver and connect to your own image management solution. you could
connect to a full blown IIIF server backend solution like Loris which hosts
your high quality files within a secured environment. The riiif server would
act like a proxy gateway serving cached derivatives.
Generating IIIF manifest files is actually the hard part. The manifest is a representation of a set of digitized assets. Getting it right requires implies finding a way to faithfully capture the complexity of digitisation. Our use case was fairly straightforward. We just display exactly one cover per record. Rendering entire manuscripts with multiple pages, retables with multiple panels, newspapers,… spanning a disparate set of metadata takes more planning and effort. Inevitably, you will have to break down your collection and write context specific code to generate use case specific IIIF manifest files.
We also didn’t include rights management in our fictiuous use case. This would be very relevant if we were to publish the covers on line. Copyright would prevent us from doing so given that covers are seen as a creative work. The framework does include the IIIF Authentication API. This is a technical solution to restrict access to IIIF resources, but the actual rights management proper is outside of the realm of IIIF. Meaning it’s up to the collection managers to roll their own solution.
The use case was also quite generic. We barely scratched the surface of what one could do with IIIF. For one, the manifest file might also contain far more descriptive and administrative metadata. Instead of just limiting ourselves to integrating a zoomtool, we could also use IIIF to create a crowdsourcing tool, or we could feed the images and metadata to a neural network. There’s still a lot left to explore.
The great power of IIIF comes from solving the technical challenges that underpin dissemination of images. Instead of burning a large part of your budget on rolling one’s own solution, you can now just get off-the-shelf open source libaries to do the heavy lifting for you. The components we’ve used in this example are all based on Ruby on Rails because that’s the framework of choice by the creators of Project Blacklight. However, IIIF is also implemented in other languages such as PHP, Java, Rust, Go and Python. The Awesome IIIF project on Github is a comprehensive list of IIIF software projects available.
Finally, the important lesson here would be that solving the techical challenge of dissemination - that is having reusable tools and a workable method - allows us to move beyond the technical side and focus on new business cases that go past just creating the next comprehensive catalog of records.